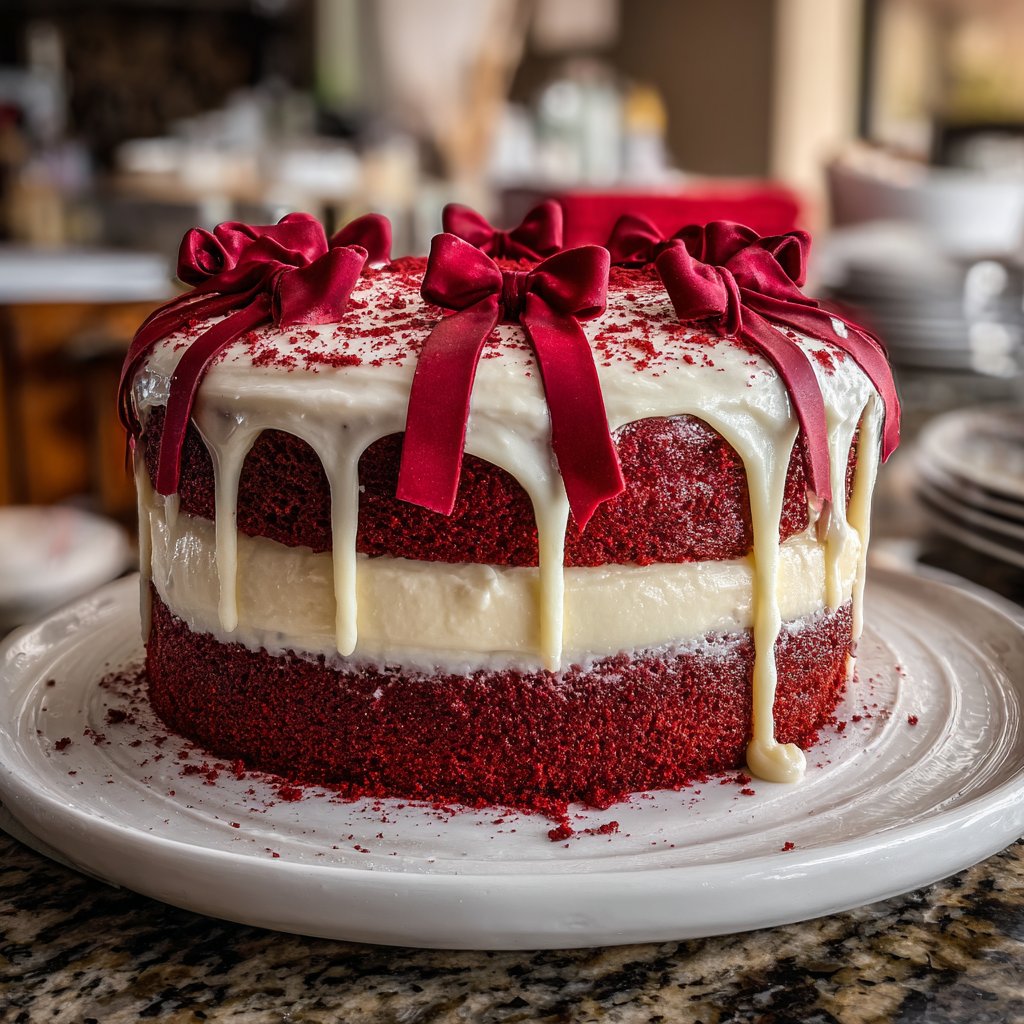
Red Velvet Birthday Cake with Bows
Highlighted under: Pastry & Sweets Corner
I absolutely love baking, especially when it comes to creating a stunning Red Velvet Birthday Cake with Bows. The rich crimson color and the velvety texture make this cake a showstopper at any celebration. The blend of cocoa and buttermilk adds a depth of flavor that complements the classic cream cheese frosting beautifully. I find that the subtle tang from the buttermilk enhances the cake's richness, making every slice irresistibly moist. Trust me, this cake is sure to bring smiles to your loved ones on their special day.
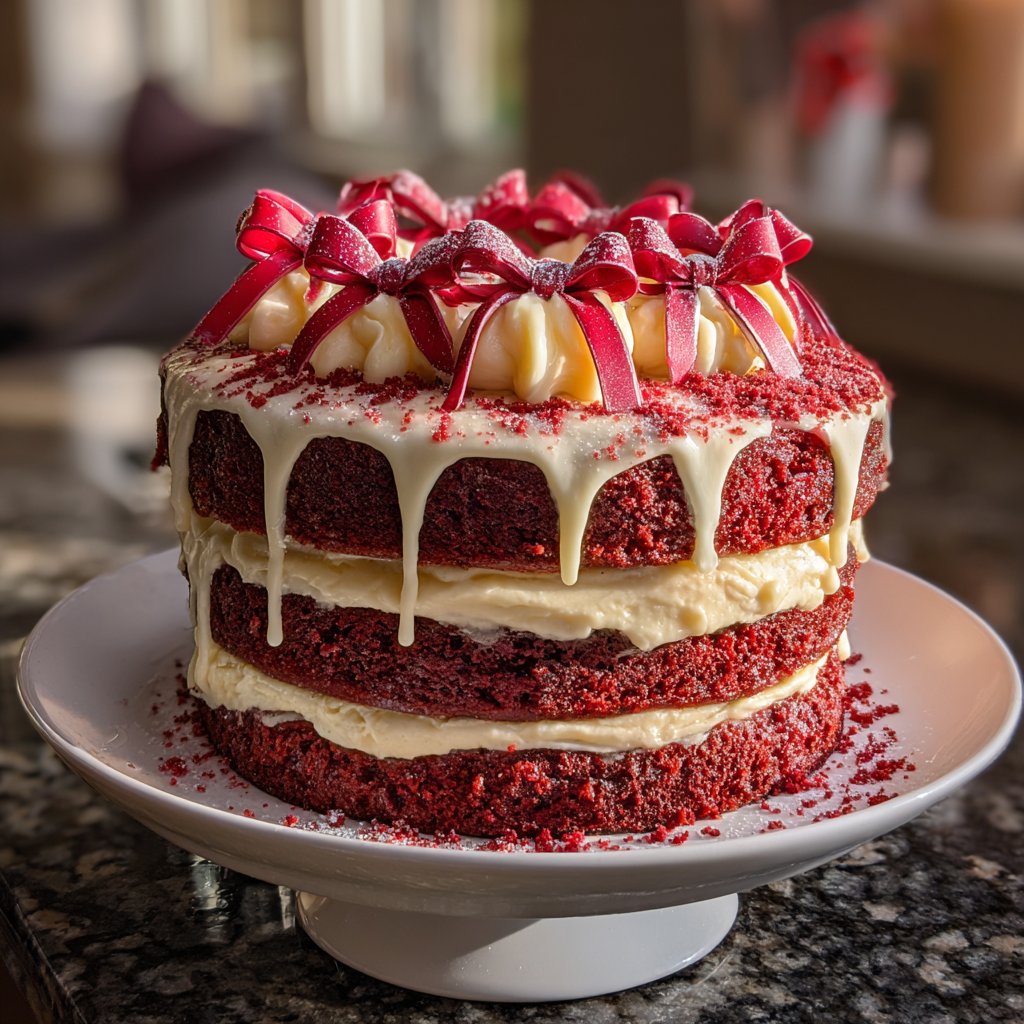
Baking this Red Velvet Birthday Cake was an adventure filled with vibrant colors and delightful aromas. I remember the first time I baked it; the rich red batter and the luxurious cream cheese frosting made the kitchen feel festive. I experimented with different frosting techniques, and I found that using a piping bag to create cute bows gives the cake a joyful touch that is perfect for celebrations.
One key tip I discovered is to ensure that your butter is at room temperature for the frosting; this little detail makes a big difference in achieving that creamy, smooth texture. Additionally, letting the cake cool completely before frosting is crucial to maintain the integrity of the layers and prevent any sliding. It really elevates the presentation!
Why You'll Love This Cake
- Stunning visual appeal with vibrant red color and delicate bows
- Irresistibly moist texture paired with creamy frosting
- A classic favorite that adds joy to any birthday celebration
Understanding Red Velvet Cake
The striking color of red velvet cake primarily comes from the use of red food coloring, but its flavor profile is equally vital. The inclusion of cocoa powder gives a subtle chocolatey note, balancing the cake's sweetness. I recommend using high-quality unsweetened cocoa for a more robust depth while maintaining the cake's signature flavor. Additionally, the acidity from the buttermilk plays a crucial role, reacting with the baking soda to produce a light and fluffy texture that’s oh-so-satisfying with each bite.
Don’t overlook the importance of room temperature ingredients when preparing your cake batter. Bringing your eggs and buttermilk to room temperature promotes better emulsification during mixing, leading to an even texture and a lighter crumb. If you forget to take them out in advance, you can quickly warm the eggs in a bowl of warm water for about 10 minutes and microwave the buttermilk in short bursts until just warmed, not hot.
Perfecting the Frosting
Cream cheese frosting is a delightful complement to red velvet cake, adding a tangy sweetness that enhances the cake's flavor. When making the frosting, ensure your cream cheese and butter are at room temperature to achieve a smooth and creamy texture. Beat the cream cheese and butter together until fully combined and fluffy; this usually takes about 3-4 minutes on medium speed. If your frosting seems too thick, gradually stir in milk by the tablespoon until you reach your desired consistency.
If you want to elevate the flavor of your frosting, consider adding a teaspoon of lemon juice or a pinch of salt, which can help cut through the sweetness and add a refreshing twist. Remember to taste the frosting after mixing in the powdered sugar; you can always adjust it to your preference. When frosting the cake, use an offset spatula for a smooth surface and create swirls for a more whimsical look.
Decorative Touches
Creating bows from fondant can take your red velvet cake from simple to spectacular. If you're new to working with fondant, remember to knead it well before rolling it out; this ensures it's pliable and easy to shape. For a professional finish, use cornstarch or powdered sugar to dust your work surface, preventing sticking. Additionally, using edible color dust can make your bows sparkle, adding that extra flair perfect for a birthday celebration.
If you're looking for alternatives to fondant, you can use chocolate modeling clay for a richer taste or even marzipan for a nutty flavor. When arranging the bows, consider the placement to create visual interest. Larger bows can be centered on top of the cake while smaller ones can cascade down the sides, ensuring a delightful surprise for the birthday honoree.
Ingredients
Gather all your ingredients together before you begin to ensure a smooth baking experience.
Cake Ingredients
- 2 ½ cups all-purpose flour
- 1 ½ cups sugar
- 1 teaspoon baking soda
- 1 teaspoon salt
- 1 teaspoon cocoa powder
- 1 ½ cups vegetable oil
- 1 cup buttermilk, room temperature
- 2 large eggs, room temperature
- 2 tablespoons red food coloring
- 1 teaspoon vanilla extract
- 1 teaspoon white vinegar
Frosting Ingredients
- 8 oz cream cheese, softened
- ½ cup unsalted butter, softened
- 4 cups powdered sugar
- 1 teaspoon vanilla extract
- 1-2 tablespoons milk (if needed for consistency)
Decorative Bows Ingredients
- Fondant or ready-to-roll icing
- Edible color dust (for decoration)
Make sure all ingredients are measured accurately for the best results.
Instructions
Follow these steps carefully to create a stunning cake.
Preheat the Oven
Preheat your oven to 350°F (175°C) and grease two 9-inch round cake pans.
Mix Dry Ingredients
In a large bowl, sift together the flour, sugar, baking soda, salt, and cocoa powder.
Combine Wet Ingredients
In another bowl, mix the vegetable oil, buttermilk, eggs, red food coloring, vanilla extract, and vinegar until well combined.
Combine Mixtures
Gradually add the wet mixture to the dry mixture, stirring until just combined.
Bake the Cakes
Divide the batter evenly between the prepared cake pans and bake for 25 minutes, or until a toothpick comes out clean.
Cool and Prepare Frosting
Allow the cakes to cool in the pans for 10 minutes, then transfer to wire racks. For the frosting, beat the cream cheese and butter until smooth, then gradually add the powdered sugar and mix until fluffy.
Frost the Cake
Once the cakes are completely cool, frost the top of one layer, then place the second layer on top and frost the entire cake.
Decorate with Bows
Using fondant, create decorative bows to place on top and around the sides of the cake.
Enjoy your stunning Red Velvet Birthday Cake with Bows!
Pro Tips
- Make sure to use room temperature eggs and buttermilk for a better batter consistency. Allow the cake to cool completely before frosting to achieve a clean presentation.
Storage Tips
Once your red velvet cake is frosted, it can be stored in an airtight container at room temperature for up to 3 days without losing moisture. If you need to keep it longer, consider refrigerating it, which can extend shelf life to about a week. Just ensure that it’s wrapped properly to avoid it absorbing any odors from the fridge.
If you've baked the cake layers ahead of time, they can be wrapped tightly in plastic wrap and frozen for up to 3 months. When you’re ready to finish them, thaw them in the refrigerator overnight before frosting them. This method works wonders for keeping the cake’s texture intact, allowing you to have a delicious cake ready for last-minute celebrations.
Serving Suggestions
When serving your red velvet birthday cake, consider offering a scoop of vanilla ice cream or a drizzle of chocolate ganache on the side. The coolness of the ice cream contrasts beautifully with the warm, rich flavors of the cake, and the ganache adds a touch of elegance. You can also serve it with fresh berries for a pop of color and a hint of tartness that balances the sweetness effectively.
For a themed party, think about creating cake pops with the leftover cake scraps and frosting. Simply mix the leftover cake and frosting to form small balls, dip them in chocolate, and insert lollipop sticks. This fun twist not only provides a delightful treat but also allows you to enjoy your baking in a new form at the celebration.
Questions About Recipes
→ Can I make this cake ahead of time?
Yes, you can bake the cake layers a day in advance and store them wrapped tightly in plastic wrap at room temperature.
→ Can I use a different type of frosting?
Absolutely! Cream cheese frosting is traditional, but buttercream or chocolate ganache also work wonderfully.
→ How should I store any leftovers?
Store leftover cake in an airtight container in the refrigerator for up to 5 days.
→ Can I freeze the cake?
Yes, you can freeze the cake layers for up to 2 months. Just wrap them well in plastic wrap and aluminum foil.
Red Velvet Birthday Cake with Bows
Created by: The Kitchenwithethan Team
Recipe Type: Pastry & Sweets Corner
Skill Level: Intermediate
Final Quantity: 12 servings
What You'll Need
Cake Ingredients
- 2 ½ cups all-purpose flour
- 1 ½ cups sugar
- 1 teaspoon baking soda
- 1 teaspoon salt
- 1 teaspoon cocoa powder
- 1 ½ cups vegetable oil
- 1 cup buttermilk, room temperature
- 2 large eggs, room temperature
- 2 tablespoons red food coloring
- 1 teaspoon vanilla extract
- 1 teaspoon white vinegar
Frosting Ingredients
- 8 oz cream cheese, softened
- ½ cup unsalted butter, softened
- 4 cups powdered sugar
- 1 teaspoon vanilla extract
- 1-2 tablespoons milk (if needed for consistency)
Decorative Bows Ingredients
- Fondant or ready-to-roll icing
- Edible color dust (for decoration)
How-To Steps
Preheat your oven to 350°F (175°C) and grease two 9-inch round cake pans.
In a large bowl, sift together the flour, sugar, baking soda, salt, and cocoa powder.
In another bowl, mix the vegetable oil, buttermilk, eggs, red food coloring, vanilla extract, and vinegar until well combined.
Gradually add the wet mixture to the dry mixture, stirring until just combined.
Divide the batter evenly between the prepared cake pans and bake for 25 minutes, or until a toothpick comes out clean.
Allow the cakes to cool in the pans for 10 minutes, then transfer to wire racks. For the frosting, beat the cream cheese and butter until smooth, then gradually add the powdered sugar and mix until fluffy.
Once the cakes are completely cool, frost the top of one layer, then place the second layer on top and frost the entire cake.
Using fondant, create decorative bows to place on top and around the sides of the cake.
Extra Tips
- Make sure to use room temperature eggs and buttermilk for a better batter consistency. Allow the cake to cool completely before frosting to achieve a clean presentation.
Nutritional Breakdown (Per Serving)
- Calories: 380 kcal
- Total Fat: 26g
- Saturated Fat: 15g
- Cholesterol: 195mg
- Sodium: 85mg
- Total Carbohydrates: 32g
- Dietary Fiber: 3g
- Sugars: 24g
- Protein: 6g